
Are you on the hunt for a stylish hat for your baby? Look no further than the Petal Beanie pattern! This comprehensive guide offers a free crochet puff stitch hat pattern, perfect for crocheters of all skill levels. Whether you’re a beginner or an experienced crocheter, this pattern will help you create a beautiful and comfortable beanie for a baby up to six months old.
Why Crochet Your Own Beanie?
Crocheting your own beanie not only saves you money but also allows you to express your creativity. Store-bought beanies are convenient, but a handmade piece carries a unique charm and personal touch. The Petal Beanie pattern is designed to provide a relaxed, comfortable fit, making it perfect for your little one. Plus, the satisfaction of creating something special for your baby is unmatched.
Materials You Will Need
Before you start, gather the following materials:
- Yarn: Choose a soft, baby-friendly yarn.
- Crochet Hook: The size will depend on the yarn you select.
- Stitch Markers: These will help you keep track of your rounds.
- Scissors and a Yarn Needle: For finishing off your work.
Understanding the Puff Stitch
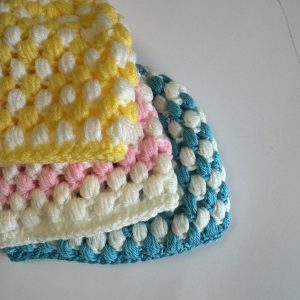
The puff stitch is a key element of this beanie pattern. It creates a textured, petal-like effect that gives the hat its unique look. Here’s a quick guide on how to crochet a puff stitch:
- Yarn Over (YO): Insert your hook into the stitch.
- YO Again: Pull up a loop (you will have three loops on your hook).
- Repeat: YO, insert your hook into the same stitch, and pull up another loop (you will have five loops on your hook).
- Continue: Repeat until you have seven loops on your hook.
- YO and Pull Through: Pull through all seven loops, and chain one to secure the stitch
Step 1: The Magic Circle
Begin with a magic circle, which allows you to create a tight, adjustable starting point for your beanie.
- Wrap the yarn around your fingers to form a loop.
- Insert the hook into the loop, YO, and pull up a loop.
- Chain one to secure the circle.
Step 2: First Round of Puff Stitches
- Create Puff Stitches: Crochet five puff stitches into the magic circle.
- Join the Round: Join with a slip stitch to the top of the first puff stitch.
- Step 3: Increasing the Size
- Second Round: Crochet two puff stitches into each stitch around (10 puff stitches total).
- Third Round: Increase by crocheting two puff stitches into the first stitch, one puff stitch into the next, and repeat around (15 puff stitches total). Continue increasing this pattern until your beanie reaches the desired diameter for a baby up to six months old. ( I mentioned the size in the video tutorial at the end of this post.)
Customizing Your Beanie
One of the joys of crocheting your own beanie is the ability to customize it. Consider adding a contrasting trim, a cute pom-pom, or even a small applique. The possibilities are endless, and each addition will make your beanie even more special.
If you enjoyed this pattern and tutorial, please share it with your friends and family. Happy crocheting!
If you have no time to make this, you can buy a finished beanie from my Etsy shop, Crochetsmash
The form you have selected does not exist.